Understanding the micro-moments of the rowing stroke is vital for crew cohesion and efficient rhythm. Coach consultant Robin Williams explains more
In this article I am going to look at the moments of time that make up the rowing stroke, and those micro-moments or high-skill areas in particular, like the entry and the connection. It’s not too difficult at low rates because there is plenty of time (novices might disagree), and if you are a bit off your timing, you can largely get away with it, or so it seems. At higher speeds and race rate, however, understanding these moments is essential for crew cohesion and efficient rhythm.
Drive and recovery time
Before tackling the micro-moments just mentioned, there are two important basic areas of the stroke: the drive, and the recovery. Knowing when to push and when to pull sounds basic, but really helps when people are trying to coordinate their power together. Feeling how to move in the recovery phase is similar. Some people are very good at getting relaxed, balanced, and re-set, while others use the time poorly and end up ill-prepared for the next stroke.
Below you can see a table about time for the drive and recovery at different stroke rates. At rate 20, the whole stroke cycle takes a comfortable three seconds with about a 2:1 ratio, or 2” for the recovery, 1” for the drive. Rate 40 it is obviously half that – so not much time.
| Stroke rate | Stroke cycle time | Approx drive time | Approx recovery time |
| Rate 20 UT2 | 3.00 seconds | 1.00 | 2.00 |
| Rate 24 firm | 2.50 seconds | 0.70 | 1.80 |
| Rate 36 firm | 1.66 seconds | (0.65 -) 0.70 | 0.96 |
| Rate 40 firm | 1.50 seconds | 0.60 | 0.90 |
Variables: The drive time for a fast eight might be lower, say half a second and peak force may come at 0.25-0.3 of a second. In slower boat types, the numbers will go the other way, so the times I am using here are to create the discussion, not to be taken literally. They will also vary with stroke length, ability of crew and water conditions.
Furthermore, this table is incomplete because it takes no account of the time needed for the entry, connection, release and exit of the spoon. Errors with these will have an impact, especially on recovery time, which I will come back to later.
For now, the important message is that time in the drive reduces as soon as you row low rate firm, but much less so in the recovery. At rate 24 firm, the drive time in the water is almost the same as it is at race rate 36. (I stress the word ‘firm’ because you can row rate 24 at perhaps half pressure.) At low rate 24 firm, the drive time has shrunk by 30% but the recovery only by 10%. But at race rate 36, the drive time has barely changed and it is the recovery time which has shrunk – by around 50%. This implies that we need to practise the skilful movements needed to cope with higher boat speeds.
“The most common fault in rowing technique is people being out of time with themselves!”
The drive
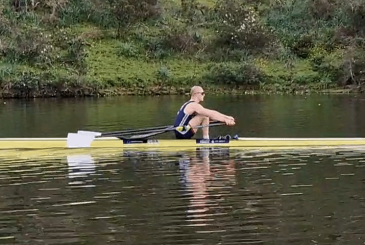
We’ll take 0.7” as our theoretical time for a firm stroke. In that time, the rower is going to move from a fully reached, closed and compressed position as in Picture 1, to a fully open, pressed and extended finish: Picture 3 is almost there. The best muscles to create the initial load and to bend the oar are the legs, hence the British Rowing technical model encourages “a front-loaded, leg driven stroke”. They do not need movement from the trunk or arms to achieve loading, just strong bracing, and so the body can hold its catch position for about 0.3” while the legs push the boat forwards.
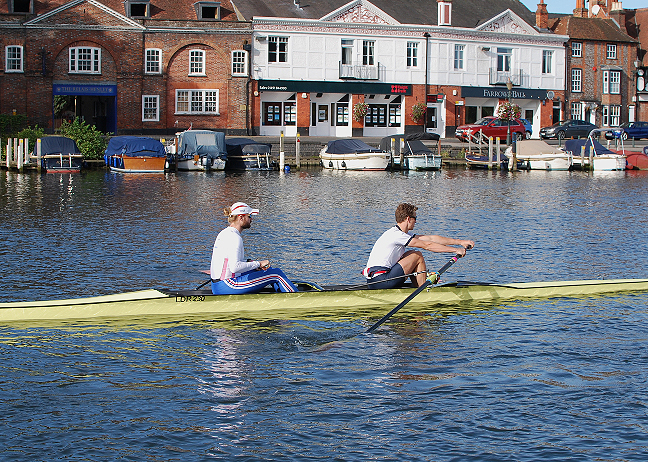
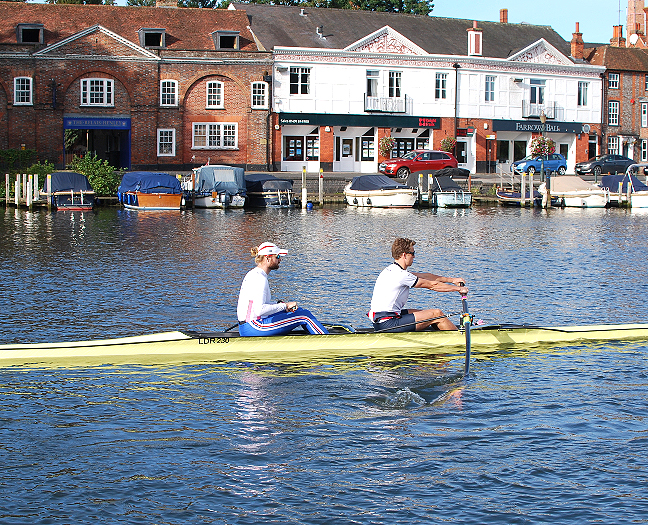
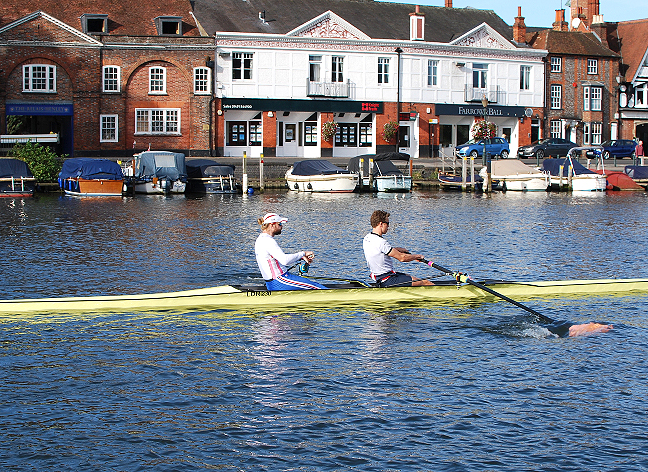
Peak Force (PF) comes at about 0.4” (about 15-20 degrees before the orthogonal) and does need some trunk movement to help the legs (see Picture 2). The legs and trunk therefore develop the middle third of the stroke without the arms pulling in. Lastly, as the legs continue and the trunk overtakes the hips, the shoulders and elbows can get involved. They only need around 0.2” or less to fully pull through.
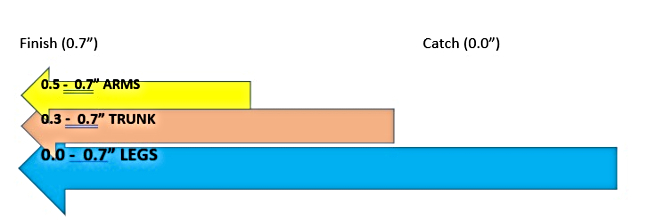
REMEMBER! We are talking about movement here: it would be a mistake to think that because the trunk or arms are not moving, that they are not working either. They are. They have to hold on very firmly at the beginning to counter the leg pressure and transmit it to the handle. They then need a lot of dynamic movement when their turn comes.
How to improve?
If the first third of the drive is for the legs, the middle third is for legs and trunk, the last third is for legs, trunk, and arms, they can easily be practised with drills like legs only, legs and trunk off the front end, or back end build up drills like arms only, arms and bodies, etc. But do them at firm pressure and explore higher rates too. With the Glover/Stanning Olympic women’s pair I once stuck red electrical tape along the top of the sax-board lip to remind them to push; then, as in picture 2 where the handle is crossing the lower shin I changed it to yellow tape, meaning push and open the body. Finally, we had green tape to signal where they could pull the arms. We then practised the power delivery at all rates and pressures and used video to check our accuracy.
“Pay attention to the micro-movements around entry and finish because these ones might make the difference between winning and losing!”
The recovery
If the drive is 0.7”, then in theory it leaves 0.96” for the recovery (at rate 36). However, this is wrong because of the necessary catch and finish movements but even more so because of the extra, unnecessary ones which all erode time. Scullers often over-draw the finish either in the water, or wing the elbows once the spoons are out. Sweepers can have similar faults. At the point where the spoon emerges it is not uncommon to see 0.2” or more of wasted movement before the handle moves off towards the stern.
A good entry might take 0.15” but this can easily double or treble with poor technique. The catch can be down to 0.01” second, but could be as much as 0.2-0.3” with rowers who connect badly. So, the 0.7”: 0.96” ratio can end up as 0.7”: 0.7” (or even a negative ratio) with the errors accounting for the major difference.
Drills to improve?
Drills like square blades and feet out are tough to do but are honest at reducing over-spill at the finish. If you go off balance or miss-sequence during the power phase then the finish is where it goes wrong.
- Finish blade dips (to practise the extraction. Use the hands and forearms, not shoulders)
- Arms-only rowing, then arms and trunk
- Inside arm only rowing (helps hold a square finish)
- Feet out
- Square blades
- Late feather (as handle is leaving the body, not arriving)
- Air strokes (also called ‘Cutting the Cake’) are great for highlighting those unwanted extra movements.
Some coaches like the pressed finish style with a micro-pause at low rates because it creates discipline in this regard, especially if you row with feet out and/or square blades. Just make sure you introduce more fluid finishes once the rate moves beyond rate 22, or the rhythm may get ‘sticky’.
The entry and connection
These two high skill micro-moments bring great rewards if executed well but spell disaster if not. A good entry for a sweep blade is around 0.15” and for sculling it is about 0.10-0.12”. This is because the sculling spoon is smaller and takes less time to cover. To ‘sharpen’ the entry rowers sometimes force the handle movement, but it often produces shoulder tension and a ‘jabby’ entry. It is also hard to keep making it faster as the rate goes up. I find it better to keep calm and anticipate the moment. Prepare well early on so there are no last-minute adjustments in the recovery, and once squared up and almost fully compressed get used to releasing the weight of the handle decisively and freely so the spoon can drop in cleanly.
Try this for an effective entry
The most common fault in rowing technique is people being out of time with themselves! Have a look at some videos and pause it at three-quarters slide. Then advance one frame at a time, pausing again when the seat stops moving sternward. Then see where the spoon is and in 99% of cases it won’t be in the water! Yet if the seat has stopped, logic suggests that the legs are compressed and are ready to push. If the blade isn’t in, rowers will most likely push anyway and leave without full-water contact, creating a bum-shove or swipe-entry. So, the way to get a 0.15” entry is to let the wheels of the seat have control of your hands and use them to enter the spoon on the last roll forwards.
The connection, however, is all about reaction. I always describe the catch as small – almost invisible, because it should start in the water, not the air, and is simply an instant linkage point between four parts: the feet, spoon, hands, and seat. Once connected, then comes the loading phase.
Everyone can have a fast catch
The nudge drill
Sit forwards, boat stationary, blade covered. Count down “3-2-1- go” and on the ‘go’ produce a calm pulse of pressure in the feet. You should feel it instantly register in your spoon, fingers, and hips. Bend should appear on the oar, but your slide should barely move 5cm. The hull should nudge forward one to two metres. This amount of hull movement shows you’ve done it right.
I think EVERYONE can do this. With a stationary boat it is not hard, and we all have the ability to react in a micro-moment. It is just like a heartbeat, or blink, so in theory we can all produce a gold-medal catch. However, the challenge comes once we are rowing a moving boat because it is much harder to synchronise those four points at the front end with yourself and the others. So, try these progressions to upskill yourself:
- Dip and nudge (as in the drill above but do four or five blade dips first, then nudge)
- Roll up and nudge (from half-slide or back stops)
- Rowing continuously, alternate one full stroke, legs only
In summary, try to have good time sequencing for the main phases of drive and recovery, but also pay attention to the micro-movements around entry and finish because these ones might make the difference between winning and losing!
Don’t miss Robin’s other articles in this series – available by searching for ‘technique’ on British Rowing Plus!


