The best way to keep your hips healthy is to keep the musculature around the hip joint strong. But why are strong hips important? Besides mitigating injury risk, strong hip musculature can facilitate improvements in your stroke. GB Rowing Team Strength and Conditioning expert Sam Boylett-Long explains.
A solid start position is the foundation of producing a strong leg drive and increase stroke length, but often athletes struggle to compress into this position or transition between strokes. This could be a technical flaw, but can be attributed to a lack of strength around the hip. Muscles around the hip are responsible for stabilising and centralising the hip joint, hence why greater strength permits the hip joint to access larger degrees of movement.
If you find it difficult to sit tall, rock over at the start or when sweeping, or compression and rotation is challenging, you may benefit from adding some hip strengthening to your programme.
Are my hips strong enough?
Whilst the subjective examples above might indicate you need more hip strength, how can we be certain? Within the Senior programme we collect peak force produced by the adductors, abductors, flexors and extensors of the hip using a handheld dynamometer. This allows us to be prescriptive with the exercises we programme to focus on the weaker groups of muscles around the hip for each athlete. Whilst you are unlikely to have access to this level of equipment there are a few bodyweight tests you can utilise to give you an idea of where to focus your pre-ergo prep work.
NB All athletes will complete some hip strengthening work three to four times a week to maintain their levels, but the volume of work (two sets per muscle group) will be lower than those looking to increase strength in certain muscles around the hip (three to four sets per muscle group).
Hip adductors
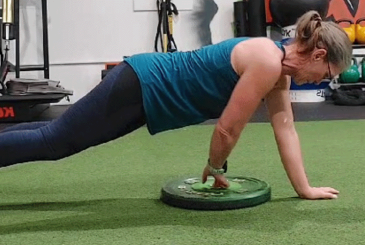
Copenhagen side bridge (long lever)
Set up: Find a table or something your top foot can rest on whilst the lower leg can extend freely underneath. If you do not have an object that fits the criteria, the bottom leg can be kept at 90 degrees knee flexion. During the test or when using as an exercise the bottom foot should remain in contact with the underside of the object being used.
Test: Hold the long lever position (shown below) for as long as possible. Give yourself one to two minutes recovery before testing the other side.
Marker: If you are unable to hold the position for 30 seconds or it feels incredibly difficult, I would suggest making time for the Copenhagen side bridge within your weekly training plan!
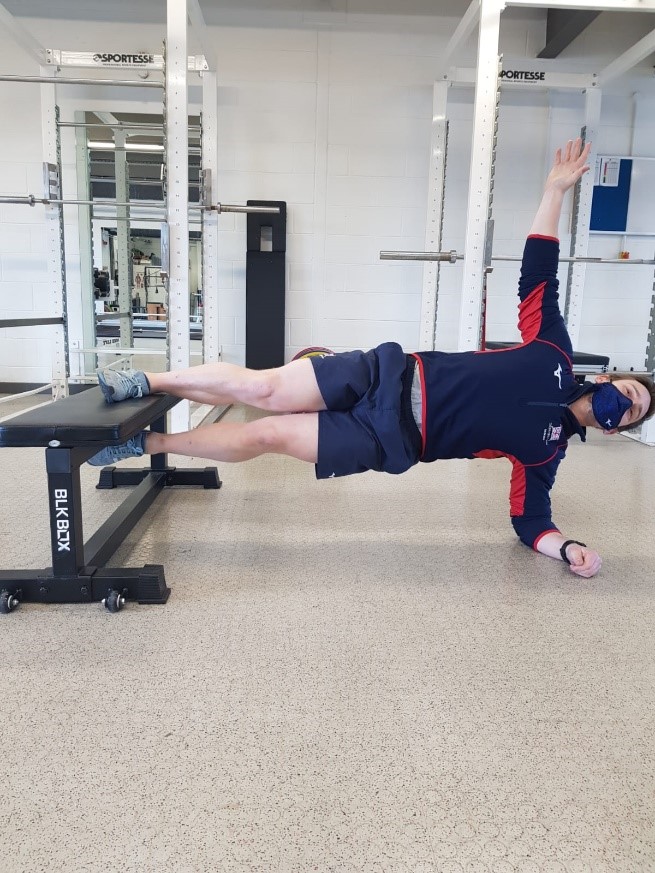
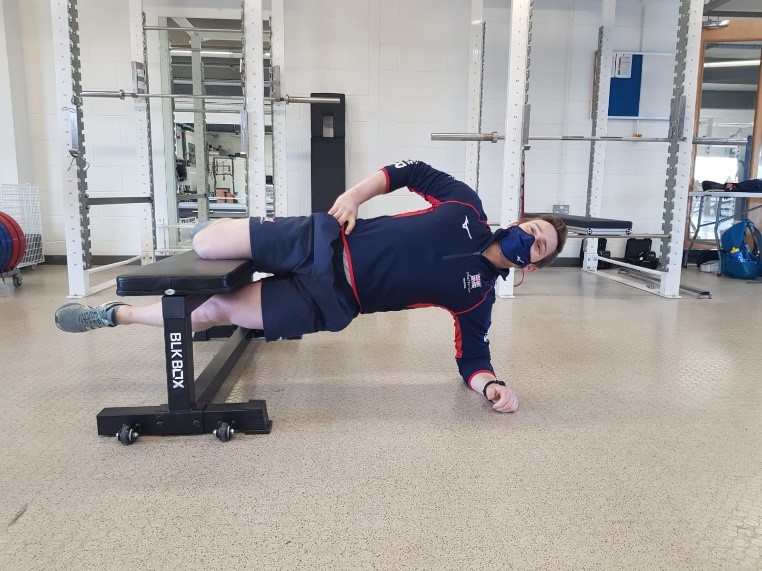
Exercise: As mentioned above the Copenhagen side plank is a great tool to assess strength and a potent stimulus to increase adductor strength. Using either the short or long lever start with 30 second reps, alternating sides for two sets of work. If you were unable to hold the long lever for 30 seconds, either regress to the short lever for 30 seconds or start at 15 second reps and build the duration each week.
Hip abductors
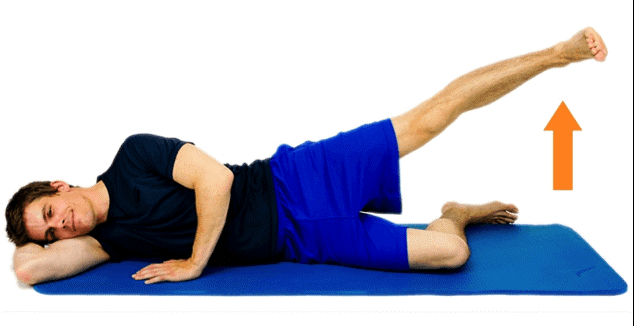
Lying hip abduction endurance test
Set up: Download a metronome app onto your phone or have someone count and time keep.
Test: Lying on your side (as shown), bottom knee at 90 degrees flexion, perform abduction by lifting and lowering your top leg. Complete as many reps as possible before loss of form or fatigue is reached. The reps should be performed at a rate of one second up, one second down.
Marker: If you are hitting less than 60 reps on either side, I strongly recommend you include some more abductor work within your ergo/work prep.
Exercises: Lateral step up to A-hold – Moving your weight laterally, push through your leg on top of the step, then finish the movement by bringing your other leg to 90 degrees knee flexion. I would aim for 10 reps each side for two sets.
Single leg hip thruster – Back elevated on a sofa or table, bend your knees to 90 degrees and then lift one up in the air. Driving through the foot on the floor, whilst keeping the other leg straight, you are trying to create an imaginary straight line between your shoulder, hip and knee. Try to hit 12-15 reps for two sets.

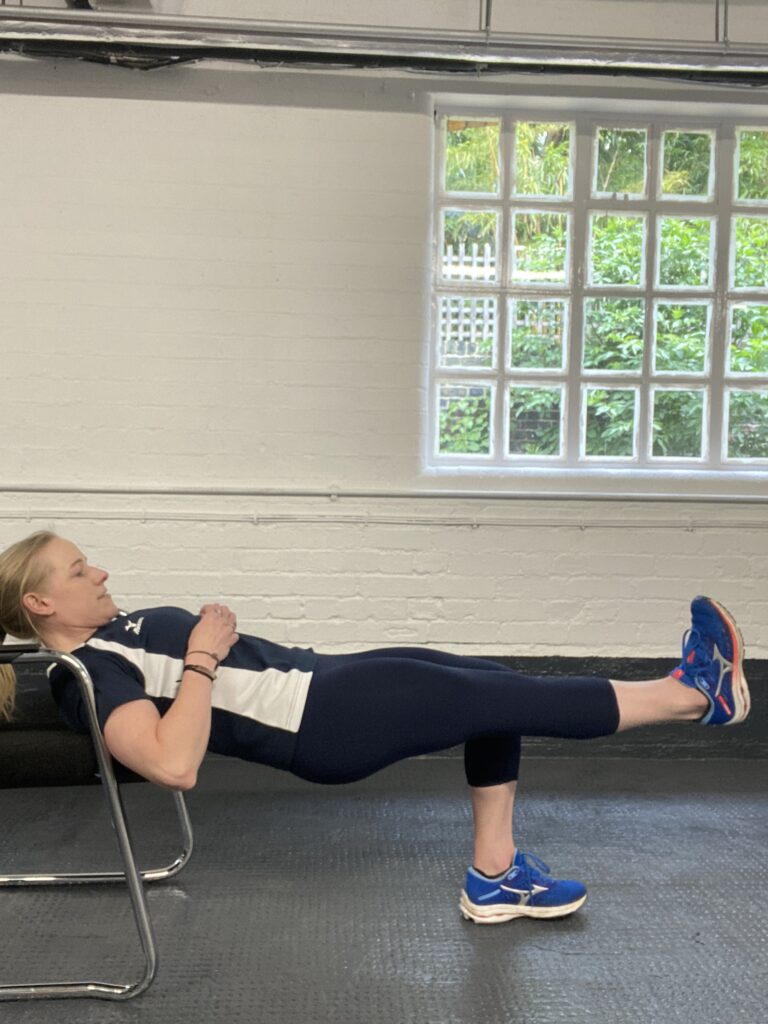
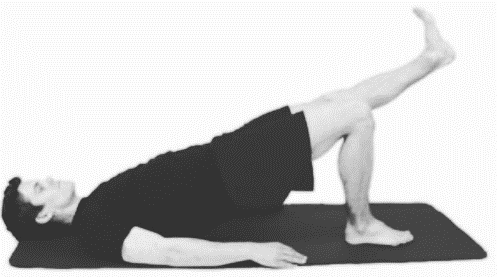
Hip extensors
Single leg bridge endurance test
Set up: Lying on your back, bring one foot up, so your heel nearly touches your bum, then lift your hips up as high as possible by pushing that foot through the floor, whilst keeping the other leg straight.
Test: The time begins once you have lifted your hips and extended one leg. The time you accrue for each side is your score. The test should be terminated when you lose control at the hip, start using your arms to push into the floor or start to lose the straight line between shoulders, hip knee, and foot of the elevated leg.
Marker: If you are unable to hold the position for 30 seconds or find it very difficult, I would strongly recommend adding some more hip extensor work to your training routine.
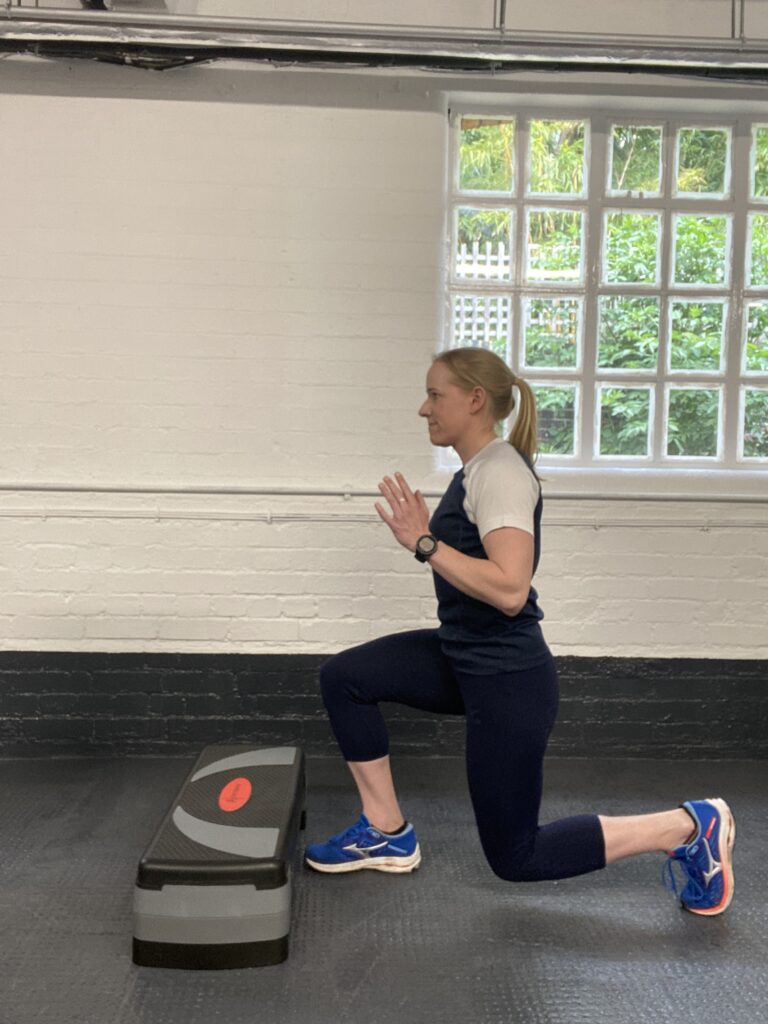
Exercise: Reverse lunge to step up. Using the bottom step, start by performing a reverse lunge, then swing the leg through and drive up onto the step using the same leg. Aim for six to eight reps for two sets.

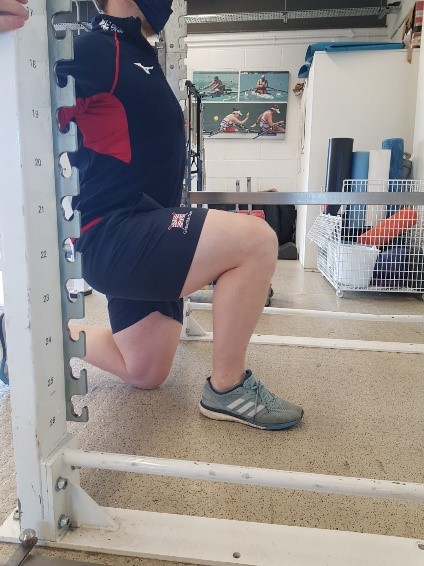
Hip flexors
Whilst there is not a specific test to perform at home for assessing hip flexor strength, you can get a gauge of their function/strength endurance with a split-kneel hip flexion exercise. It is important to note that some form of hip flexor work should be a staple of your ergo prep.
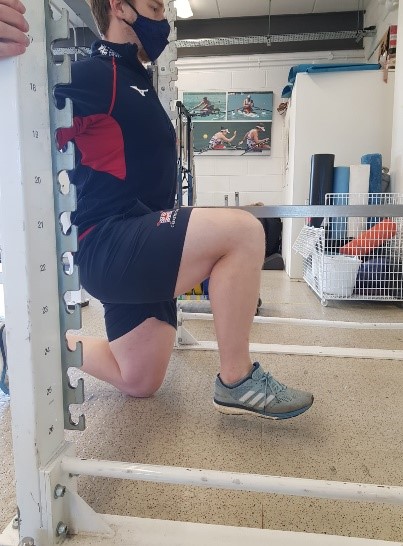
Set up: Using a door frame for support, begin in a split kneel position, once stable, lift the front foot off the floor for controlled repetitions.
Test: Using a metronome app, or having someone count and time keep, complete as many reps as you can without loss of form. Performed each rep at the rate of one second up, one second down.
Marker: If you are struggling to complete 20+ reps, this would be a reasonable indicator to increase the amount of specific hip flexor work.
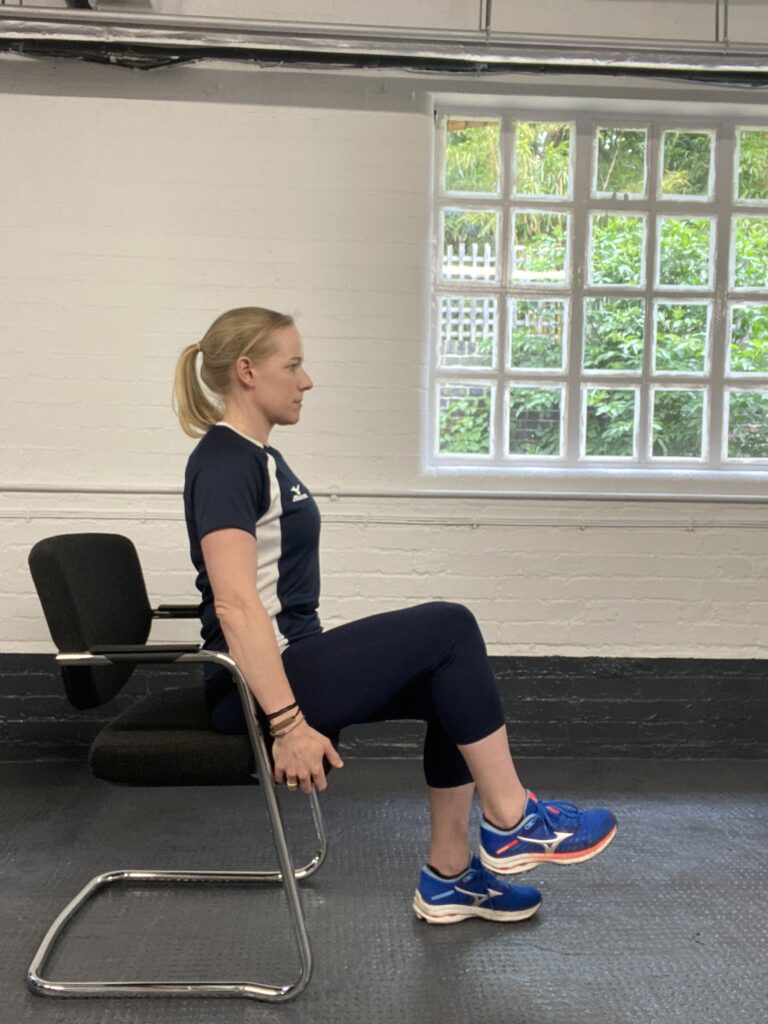
Exercise: You will get some hip flexion conditioning in the reverse lunge to step up, the lateral step up to A-hold. and the single leg hip thruster exercises (mentioned above). To bias the hip flexors you can use the split kneel hip flexion test itself to develop flexor strength. Aim for 15 reps x two to three sets. An alternative is a seated hip flexion using an office chair with the same strategy as above!

Your hip health programme
Now you have a handle on the strength of each of the main muscle groups around the hips, you might be thinking how does this all fit into my programme?
On the senior programme, we advise athletes who need to maintain strength around the hip to complete two to three sessions per week of 10 minutes hip-specific conditioning. Athletes we identify as having weaknesses in any of the above areas should be completing four to five sessions a week. Four to five sessions per week will bring meaningful changes to the musculature around the hip. Re-test after a four-week block of training to assess the effectiveness of this.
After testing, when putting a programme together, remember that the aim is to build a strong and symmetrical set of hips, so it makes sense to bias the muscle groups/sides which are lagging.
For more on the crucial role that your hips plan in rowing efficiently, read coach consultant Robin Williams’ article Using Your Hips for Good Technique.
This article was first published in April 2021.
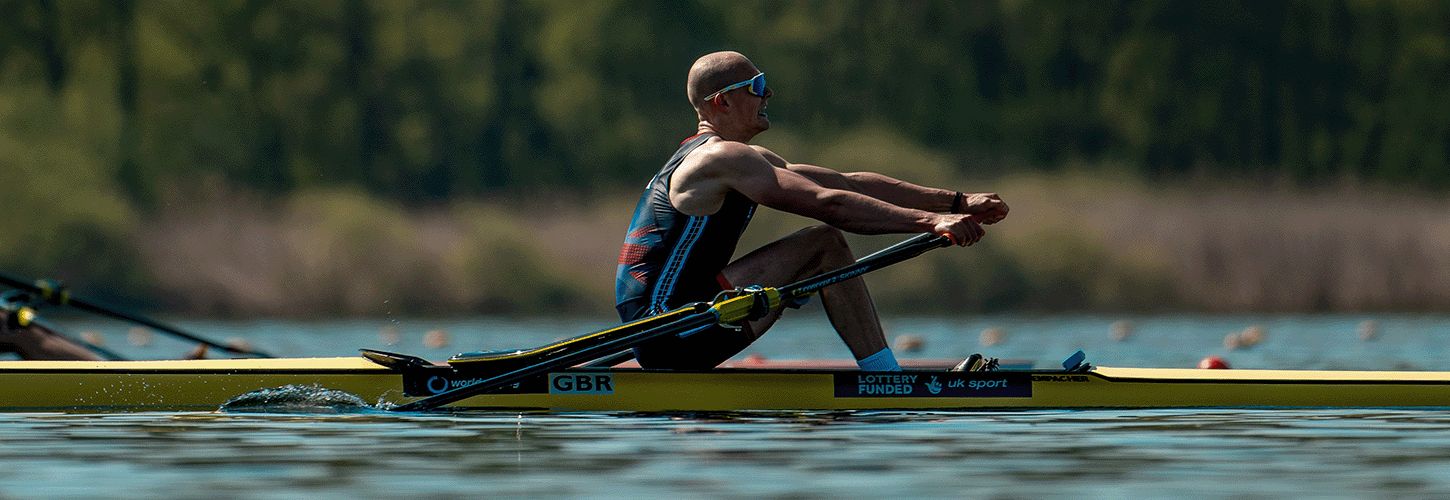
Banner photo: Benedict Tufnell.